visit website photoshopqu.com

To recreate the light patterns of the Aurora Borealis you'd probably turn to Photoshop's filters and effects. Use Illustrator however, and you'll not only achieve a stunning end result, but you'll also benefit from the flexibility of working with vectors. This is an intermediate level tutorial rewarding you with an attractive desktop wallpaper for your efforts!
Step 1: Beginning the Background
We'll begin by making our backdrop of the night sky. Place a rectangle of 1680 pixels by 1050 pixels on your artboard and give it a color of #151121.

Step 2: Background Mesh
Select the Gradient Mesh Tool and click three times on your rectangle to segment it into twelve areas.
Numbers, dimensions and colors throughout this tutorial are arbitrary, use whatever values you please. Have you ever seen the Northern Lights look identical in two different photos?

Step 3: Background Gradients
Recreate the colors you see below by clicking the Direct Selection tool and selecting each mesh point individually. Once selected, the color, the position and the handles of a mesh point can be altered.
For more detail on the Mesh tool take a look at Rype's tut on Create a Glowing Abstract Light Vector Graphic.

Should you want to replicate these colors precisely, here's a sample palette.

Step 4: The Stars
We've finished our backdrop for the time being, now let's concentrate on scattering a few stars around.
Make yourself a circle with the Ellipse tool, then copy and paste in place (Command + C, Command + F). With the new circle selected, go to Object > Transform > Scale, and scale it to 25%. Give it a Normal transparency of 40% and color it #F2D0DC. Select the original circle, give it a Color Dodge transparency of 0%, and color it #E52266.

Step 5: Blending
Select both circles and go to Object > Blend > Blend Options. Choose Specified Steps in the dropdown and enter 25 as the amount, then click OK. Now go to Object > Blend > Make.

Step 6: Bright Centre
Use the Direct Selection tool and click on the centre of the smaller circle. Copy and paste in place (Command + C, Command + F). Now give the resultant circle a Normal Opacity of 90% and color it white (#FFFFFF).

Step 7: Checking the Star
Place what has become your first star on the dark background to check that the transparency and blending has given the result you wanted.

Step 8: Alternative Colors
Repeat this several times creating a small collection of blended circles, all with different colors.

Step 9: The Milky Way
Copy and Paste (Command + C, Command + V) your stars, placing them randomly around your background. Alter the Opacity and Scale them as you go. Once they're in place, group them together (Command + G).

Step 10: Prepare an Opacity Mask
Make a rectangle over your grouped stars, then with the Gradient tool give it a gradient similar to what's shown below. It should go from white to black vertically and begin fairly far down the rectangle.

Step 11: Select the Objects
With your gradient rectangle selected go to Select > Next Object Below. This will select the object directly underneath your gradient rectangle. Now hold down Shift and select the rectangle too. You should now have the grouped stars and the gradient rectangle selected.

Step 12: Make an Opacity Mask
Click on the menu in the Transparency panel and select Make Opacity Mask.

The stars will have taken on a faded mask whereby they shine completely through what was white in your rectangle and become invisible behind what was black. Everything in between appears with the appropriate amount of clarity. Your stars will be less visible towards the bottom of the sky.

Step 13: Your Aurora (Try Saying that Late on a Friday Evening)
Okay, we've dealt with our night sky and the stars dotted around it. Now it's time to tackle the light effects. Begin by making a rectangle of more or less the proportions shown below and with a dark purple color of #130119.

Step 14: Gradient Mesh
Whilst no objects are selected, set a color of #7CA491 in your toolbar, then select the Gradient Mesh tool. Click on your recently created rectangle roughly where shown to make a mesh point with the color you've just chosen.

Step 15: Plenty of Mesh Points
Go along the existing horizontal mesh path with the Gradient Mesh tool and add around twenty new points. They will all automatically inherit the color of the first.

Step 16: More Mesh Points
It's getting a bit meshy (as Sean Connery once said), but one last mesh path before we can start coloring our light. Place it roughly midway between the top and bottom of your rectangle to give you the following result.

Step 17: Peaks and Troughs
Having completed the mesh, take your Direct Selection tool, and one by one raise some of the mesh points to create peaks. This is again completely random and it's up to you how many you raise or lower and how far.

Step 18: coloring the Mesh Points
Select individual or groups of mesh points on the first of the horizontal mesh paths you created and subtly alter their color. We're trying to create movement with this effect, so try and give the impression of areas falling away or coming closer.

Again, here is a sample palette of the colors in this example, just in case you need them.

Step 19: Envelope Distort
We need to create waves in our object for the final suggestion of movement. It's probably possible by altering the handles of your mesh points, but you won't be making your life easy. Instead we turn our attention to Illustrator's Envelope Distort feature.
Keep your mesh object selected and go to Object > Envelope Distort > Make with Mesh. There are several ways to manipulate an object Envelope Distort, this way will add a new mesh over your rectangle with as many points you determine.

Step 20: Define the Envelope
In the Envelope Mesh dialogue, choose how many rows and columns you want to work with, then click Preview to get an idea of how it will look. In this case, I've kept it relatively simple with just two rows, but the fewer mesh points you're altering, the smoother the resulting form will become.

Step 21: Shear
Before we add waves, we'll shear the rectangle to splash it across the sky in one easy step. Select the Shear tool, then click on either the left or the right side of your envelope mesh object, and drag to shear it, as shown below. Hold Shift down while doing so to ensure that the peaks and troughs remain vertical - not essential but helps the final effect.

Step 22: Distort
Having played around with Gradient Mesh objects, this will be second nature to you. With the Direct Selection tool, alter the Envelope Mesh points individually or in groups to create smooth wavy forms. Bend the handles on each point and try to create consistent movement in the object. Imagine you're wiping the object upwards and towards the left.

Step 23: Blur
Now we're getting somewhere.
With your distorted, sheared, colored, meshed rectangle selected, then go to Effects > Blur > Gaussian Blur. In the dialogue which appears, choose the amount of blurring you want. In my case 3 pixels is fine, but you can check what your object will look like in the preview pane and adjust appropriately.
Note: If you intend to print the resultant image you'll need to make sure the blur is rasterized at a high resolution. By default the blur will be rastered at 72 dpi to optimize processing time, but for printing purposes it is likely you'll need 300 dpi. Go to Effects > Document Raster Effects Settings to alter this.

Step 24: Transparency and Position
Give your object a Lighten transparency, then scale and position it above your background and stars. The Lighten transparency of your object will cause any areas which are darker than what's underneath to disappear. You'll be left with fluorescent waves and stars shining through them.
 Step 25: Finishing Touches
Make a secondary Aurora (perhaps smaller, less opaque and blurred more) and place somewhere among your objects. Group everything together, then place a rectangle of 1680 px by 1050 px on top. Select everything and press Command + 7 to use this rectangle as a clipping mask.
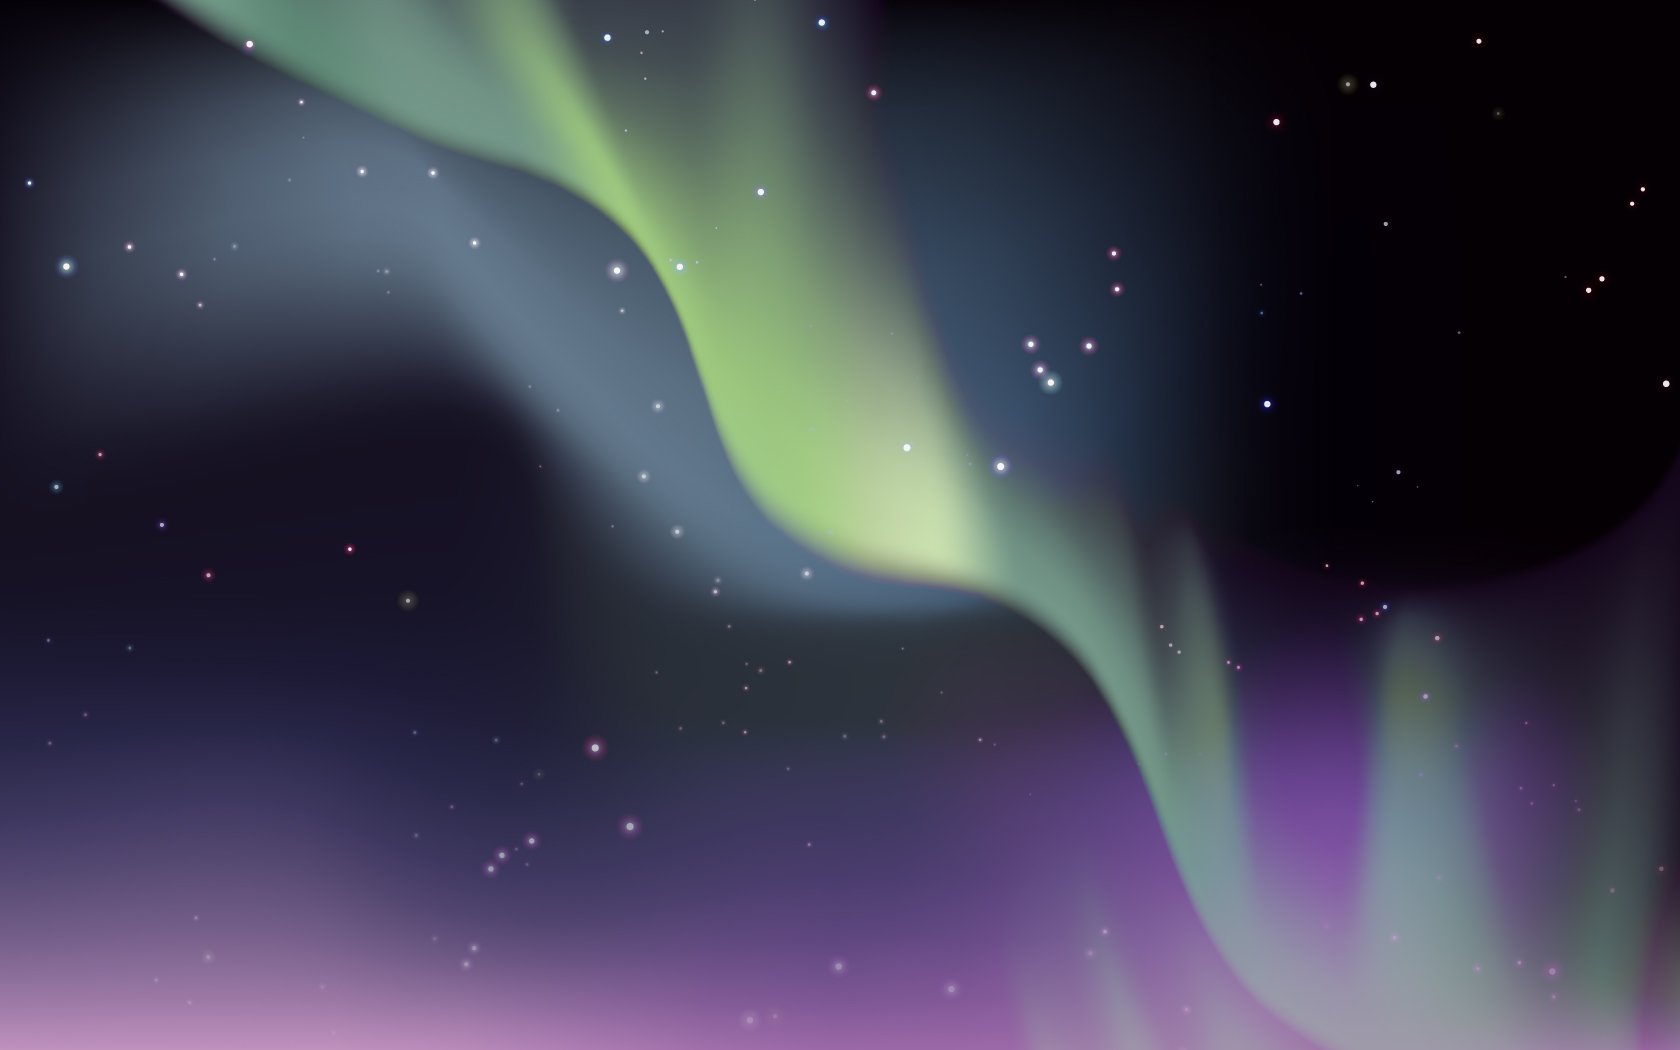
Conclusion
Finished! After following these twenty-five concise steps you should have something attractive and unique to decorate your desktop with! It's little wonder those clever people at Apple recognized the aesthetics of auroras with their last OSX release. The larger version is available here.
Subscribe to the VECTORTUTS RSS Feed to stay up to date with the latest vector tutorials and articles.