visit website photoshopqu.com
1. Create a Radial Gradient
Step 1
Let's get started by drawing a circle using the Ellipse Tool (L). Hold Shift as you drag on the canvas to make it a perfect circle. Next, change it to a Gradient Fill. By default it is a white to black gradient.
Step 2
Open up your Gradient panel (Window > Gradient). Change the Type to Radial and select the Gradient Slider (square with an arrow icon). Set it to blue using your Color panel.
Step 3
Select the first Gradient Slider and set it to a dark blue. Click beside it to create a new Gradient Slider, and set it to white. Repeat this to create a new Gradient Slider beside this new point, and set it back to blue.
Step 4
Let's continue repeating the steps until we have something as shown below. You will notice the darkest point is set in the middle. Don't worry too much how the ripple will look like at this stage, as we can tweak it later on.
Step 5
Select the circle and you will see a bounding box appear. Drag a corner and squash it into a an oval shape.
2. Create the Background
Step 1
Now we will start creating the background. Draw a new Rectangle (M). By default it will use the radial gradient we have created.
Step 2
Open up your Gradient panel again. Change it to a Linear Type this time. Keep the start and end points. Delete the rest of the unnecessary points. Finally, select the start point and change it to a lighter blue.
Step 3
Send the background to the back by pressing (Control + Left Bracket). Resize the background so that we have more space on the top. Select the Gradient Tool (G) and click and drag from top to bottom to change the gradient direction.
3. Add Ripples
Step 1
Let's draw more ripples to make it look more realistic. Draw a new oval shape using the Ellipse Tool (L). Select the Scissors Tool. Then cut it at the bottom left and top right. This will break it into two segments.
Step 2
Drag the two segments into the ripple. You can resize it by dragging the bounding box. Repeat the above steps to create more ripples, as shown below. Have fun adding new ripples until you achieve a great looking ripple effect.
4. Create a Ripple Brush
Step 1
Let's start creating the brush for the ripple. Draw a long thin oval with the Ellipse Tool (L). Select the Pen Tool (P), hover it to right corner, and hold Alt. It will change to an arrow icon. Click the point to change it to a corner point. Do this for the left corner and bottom pont.
Step 2
Click the bottom point and press the Arrow Up key to move the point until the baseline becomes straight as shown below. Open up your Brushes panel (Window > Brushes). Then drag your shape to the panel to create a New Art Brush.
Step 3
Select all the ripples and choose the new art brush. The brush effect will be applied to the ripples. If the ripples appear too thick you can change the Stroke Weight to make it thinner.
5. Apply a Gradient to the Ripples
Step 1
Now we will need to expand it so that we can fill it with a gradient. Select all the ripples, and go Object > Flatten Transparency. Set the Raster/Vector Balance to 100 and click OK. It is grouped by default after your flattened it. Press Control + Shift + G to Ungroup it.
Step 2
Select each ripple and give it a different color gradient effect. With the Gradient Tool (G), we can select and drag to change the gradient directions. We can also also use the Eyedropper Tool (I) to pick colors from our main ripple. To do this, select a Gradient Slider first, then select the Eyedropper Tool (I) and hold Shift as you click the main ripple to sample the color. With this in mind, we can quickly apply the gradients to all the ripples.
Step 3
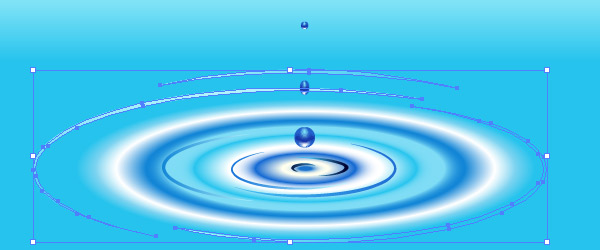
Here is the final ripple. I have set the darkest ripple in the middle and it get's lighter towards the edge.
6. Create a Water Droplet
Step 1
Let's create the water droplet. Draw a blue circle using the Ellipse Tool (L). Go to Object > Create Gradient Mesh. Use the settings shown below.
Step 2
With the Direct Selection Tool (A), select the second point from the bottom. Set it to white using the Color panel. Next, select the second point from the top and give it a lighter blue.
Step 3
Select the three points in the middle row and set it to a darker blue. Next we will start to edit the gradient mesh. Select the point beside the white point and drag it away from the white point. Do this for the other side and the three darkest points. Our goal here is to make the white highlight more oval instead of circle.
Step 4
Finally we move the water droplet above the ripple. Click and hold Alt as you drag to create a duplicate. Repeat it until you have three water droplets above the ripple.
Step 5
Squash the second water droplet and resize it smaller using the Free Transform Tool (E). Also make the top water droplet the smallest. Finally, I make my final tweaking to the ripple by transforming it bigger as I felt it is too tight.
Step 6
If you are unhappy with the color for the the water droplets, you can further adjust it. Here's how to do it. Select the three droplets and go Edit > Edit Colors > Adjust Colors. Check Preview and increase the Green to make it look turquoise.
Great Work, You're Now Done!
Below is our final image of a serene water ripple effect.
